Linkedin introduced in 2021 a new great function to create a newsletter to connect regularly with your target market and connections. In this article, I am going to step you through what to do and how to create a LinkedIn Newsletter.
Before you start crafting your newsletter, you need to activate your account to creative mode.
Setting your profile to creator mode
To activate your profile to Creator Mode.
To do this simply,
- Log in to your LinkedIn profile
- Click on your profile
- Scroll down to the Resources section
- You will see Creator Mode as the first option, click this to ON.

Setting up your Newsletter
Newsletters are created in LinkedIn via your Write Article post options.

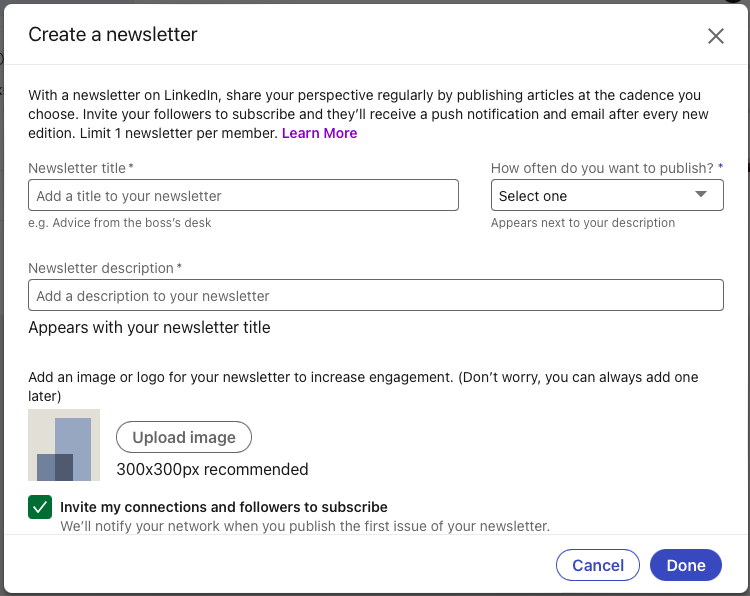
When you are creating it the first time, you will need to set up your Newsletter first.
To do this,
- Go to your profile overview feed
- Click on Write Article
- You will see a button called ‘Create Newsletter’, click this button
- Create your Newsletter title (please note you can change this at any time)
- Select how often you will publish your newsletter.
- Add your newsletter description
- Upload an image for your newsletter (would recommend profile headshot for better audience connection)
- Make sure have ticked the box for Invite my connections and followers to subscribe, and
- Make sure you have ticked the box Subscribe me to my newsletter.
Writing your content
Now that your newsletter is set up, you can start writing your content. This is done through the Write article feature.

Now that your newsletter is set up, you can start writing your content. This is done through the Write article feature.
If you need to change your Newsletter name or image, when you click into the Write article section, you will see an editing pen and word so you can make the edits there.
Simply write your article as you desire. You can add images and also links.
Once completed, click Publish.
Alternating between your Articles and Newsletter feature
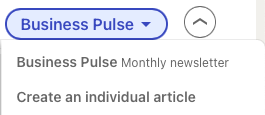
Now that you have set up your newsletter, does not mean you can’t write individual articles. When you go into your Write article section, you will see a button next to publish the will show your newsletter name, when you click it you can see a dropdown menu to select either ‘create an individual article’ or ‘newsletter’.
What happens after you publish?
Once you publish your newsletter, connections and followers will receive and notification of an invitation to subscribe. This is found under the Network section (same place as invitations to connect with people received). They will also be given the option to subscribe to your newsletter.
For clients I have helped launch their newsletters, we have hit over 100 subscribers in less than 1 day.
Need help?
Whether you are digitally challenged, or simply time-poor, please feel free to contact me to see how I can support you.


